What You
Will Need
Paint shop Pro 9 -
10
My supplies zip
here
Plugin VM
Toolbox - Instant Tile
here
Plugin AB 08 - WireMeshing Unilimited (in the zip)

Thanks to
Ely
for the translation in English
This tutorial is my own creation, do not reproduce it on
other sites without my permission
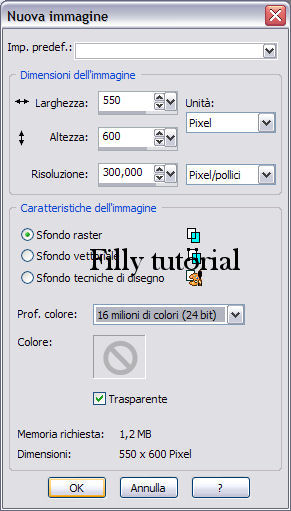
Open
an image with these settings
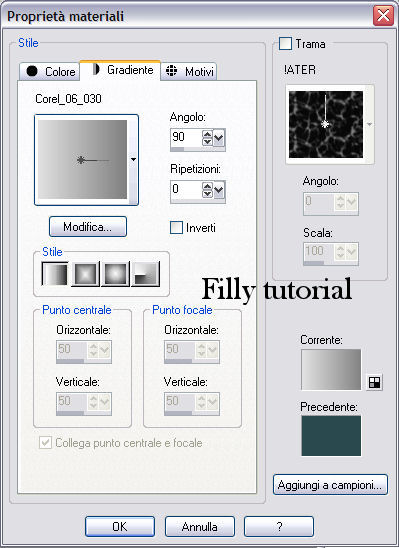
Fill out with the
Corel_06_030 gradient with these settings
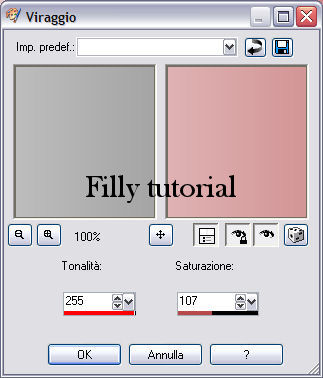
Adjust - Hue
and Saturation - Colorize
with
these settings
Layer - New Raster layer
Fill in with this
color #943e3d
Apply the AB 08 - Wiremeshing Unlimited plugin
with these settings

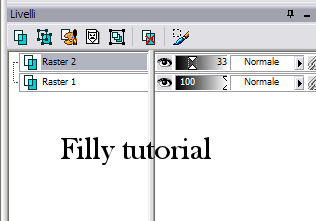
Lower the opacity to
33%
Open the filly (172)
tube copy and paste as a new level and place as showed
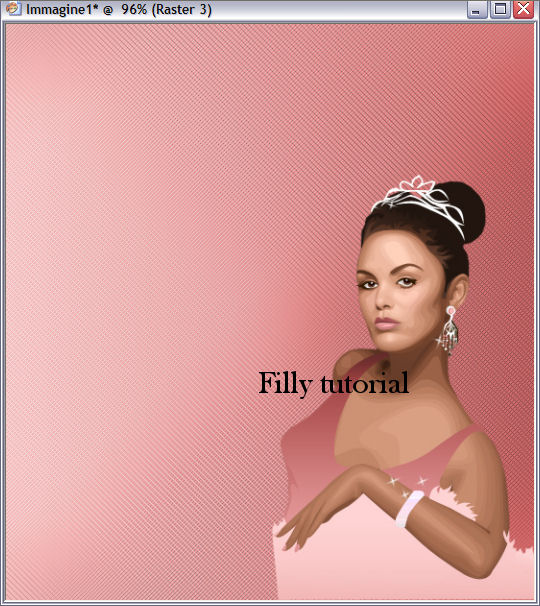
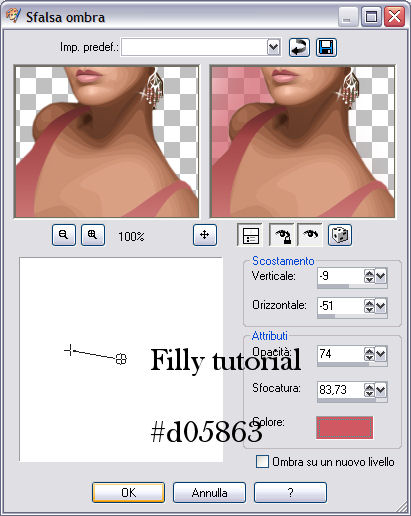
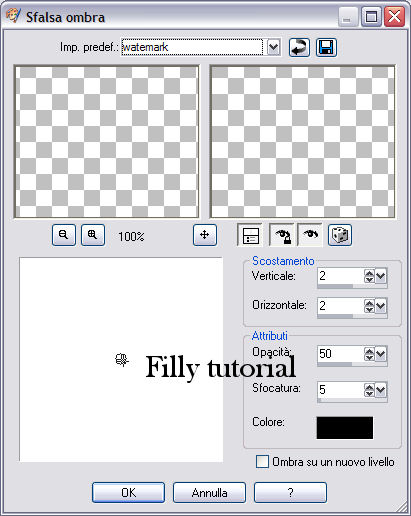
Drop Shadow and use these settings
Layer - New Raster layer
Set the Brush_Vector_heart
with these settings and this
color
#943e3d

Click with the brush 2
Times crossing until u will have a motive like this

Open the tube
Accent_1 copy and paste it as new level
Place it at the top
Adjust - Hue
and Saturation - Colorize
with same settings as
before
Drop Shadow
with same settings as
before
Layer - Merge visible
Duplicate the image
and keep it
Keep on work with the
Original image
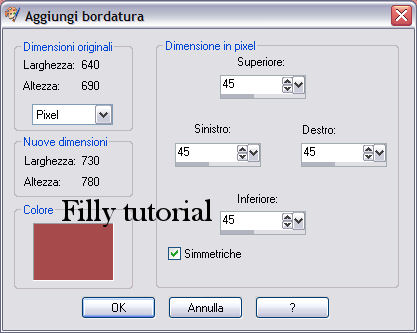
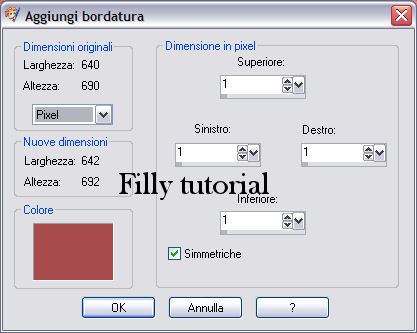
Add border with these
settings
Set the magic wand
with these settings

Select the border -
Selection invert
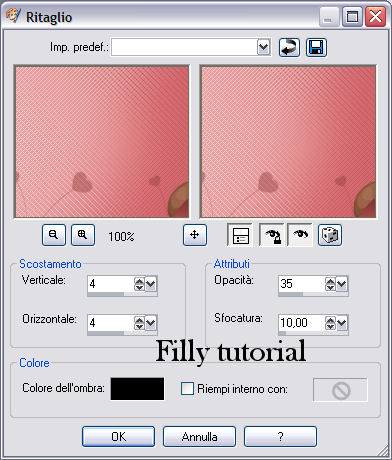
Effects
3D - Cutout
with these settings
Repeat with negative
settings in orizzontal and vertical
Deselect
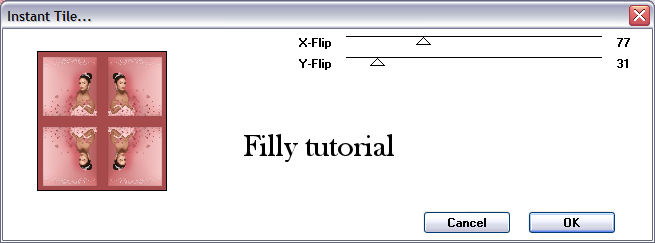
Apply the VM toolbox
plugin - Instant tile
with these settings
Now go to the image
that u previously kept
Add border as image
Set the magic wand
with these settings
Select border -
Select invert
Effects
3D - Cutout
with these settings
Repeat with negative
settings in orizzontal and vertical
Deselect
Copy the image and
paste it as new level on the main tag
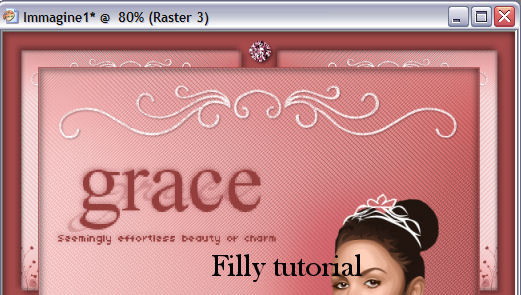
You'll have this
result

Place yourself on the
background level with the magic wand select border
Effects
3D - Cutout
with these settings
Repeat with negative
settings in orizzontal and vertical
Deselect

Open the accent 2 tube
copy and paste as new level
Drop Shadow and use these settings
Layer - New Raster layer
Set the RTBrush_Grace
like this with this as main color
#943e3d

Place the image as
showed
Insert your name down
the tag, not too big you choose the font
Add a 1 pixel border
with this color #c0c0c0
Select border with
magic wand
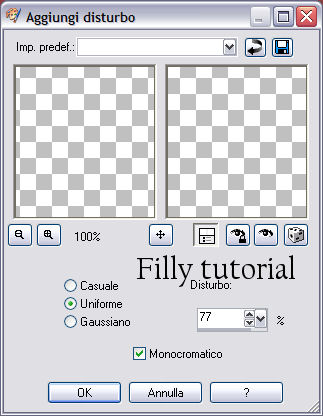
Adjust Add noise
with these settings
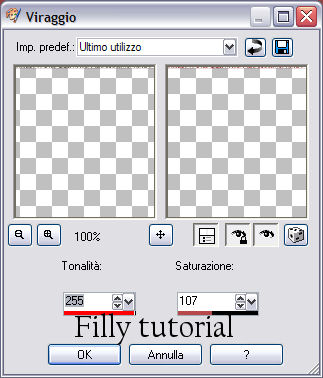
Adjust - Hue
and Saturation - Colorize
with these settings
Deselect
Save it as jpg file
tag is ready