
What You Will Need
Paint shop Pro 9 -
10
My supplies zip
Here
Plugin Virtual Painter5
here
When you install the plugIn, remember to give it the path to
PaintShop!

This tutorial is completely my invention, you may not reproduce
it on any other Websites without my permission.
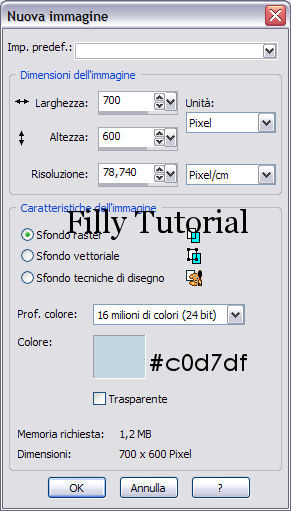
Open a canvas with
these settings:
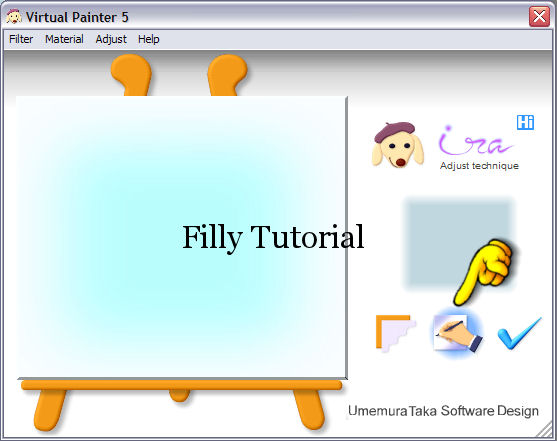
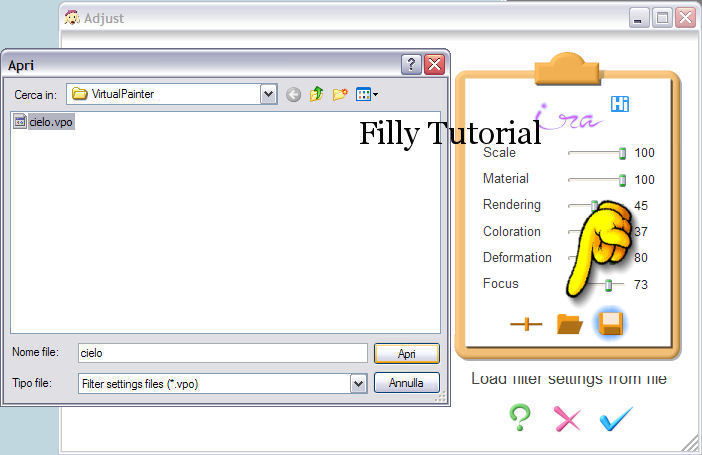
Apply the plugin
Virtual Painter, load the preset you found in the zip file which
I included
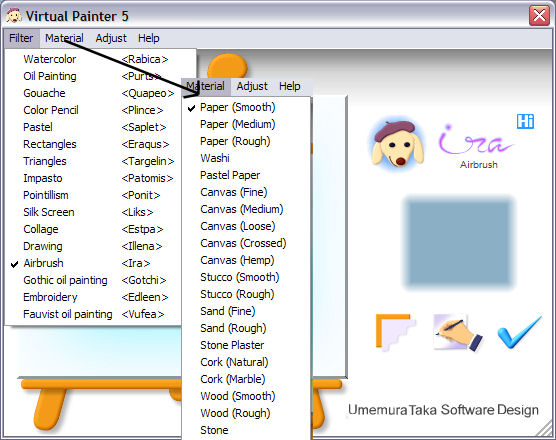
Click where I have
made a mark
Go into the folder of
the filter and find the Preset: Cielo
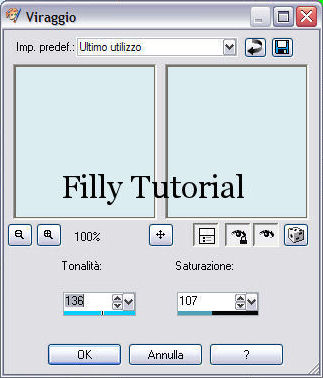
Adjust - Hue and Saturation
with these settings:
New Raster Layer
Brush Tool, find Aurora brush, color #c0d7df, with these
settings:

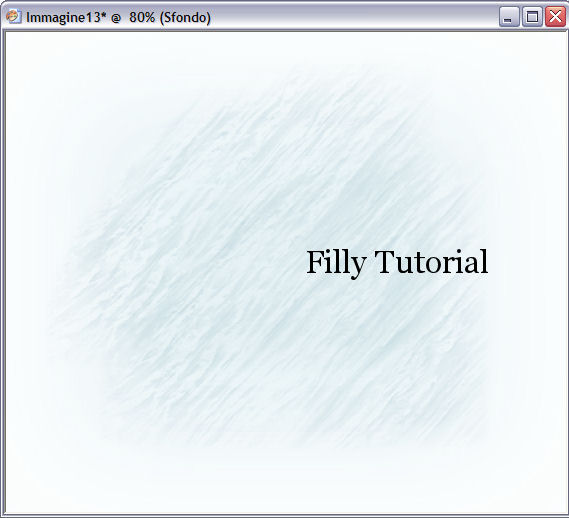
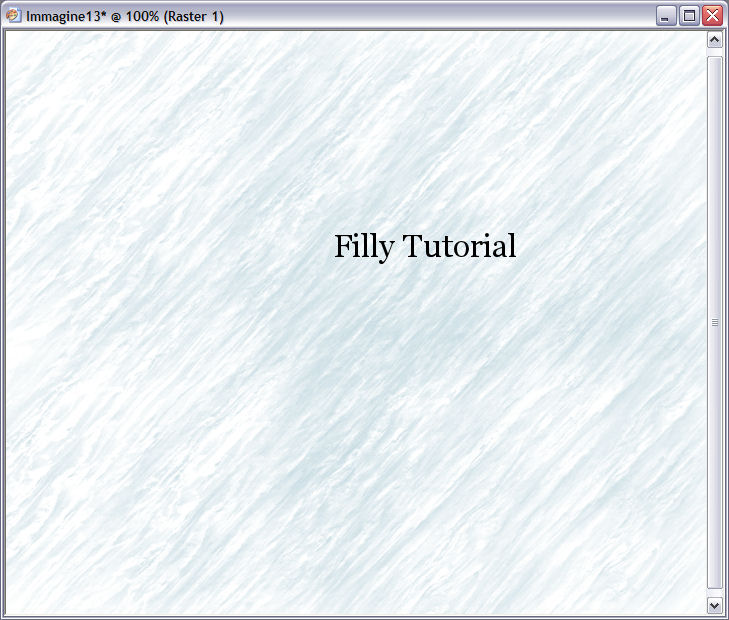
Color the center of
the canvas, as shown in the image below
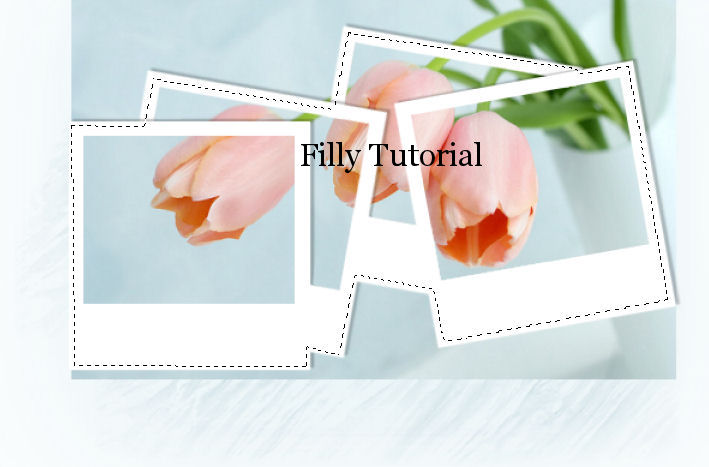
Open tube filly_Frame1
Copy it and paste as a new layer
Open the image HomeFlower_2001> copy and paste as a new Layer
Position it (see position as shown here below)
Select your selection tool free hand, and use these settings

Trace the outline of the photo like shown here below
Selections Invert
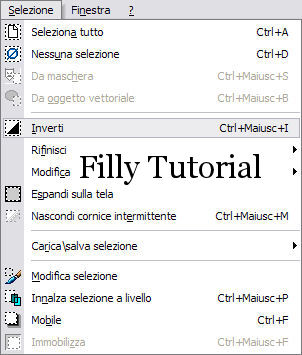
Click on your keyboard DELETE and eliminate what you think is
too much
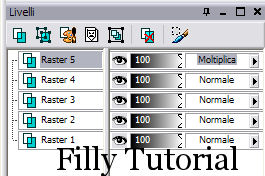
New Raster Layer
Brush tool> Find agi_wb_decoratemylife, and use the following
settings

In your layer palette change the blend mode to Multiply
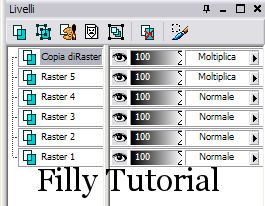
Duplicate the brush layer in your layer palette
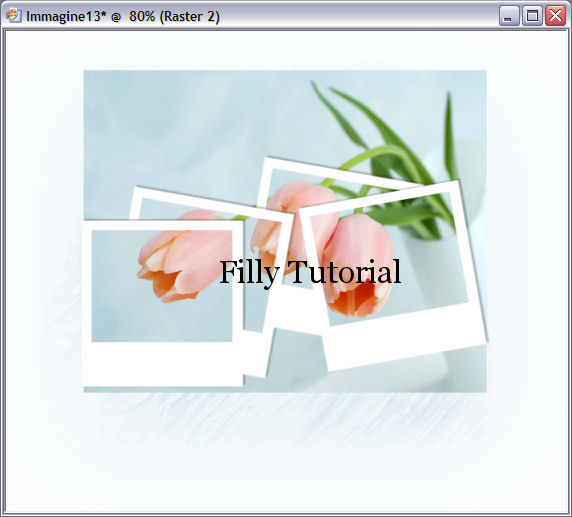
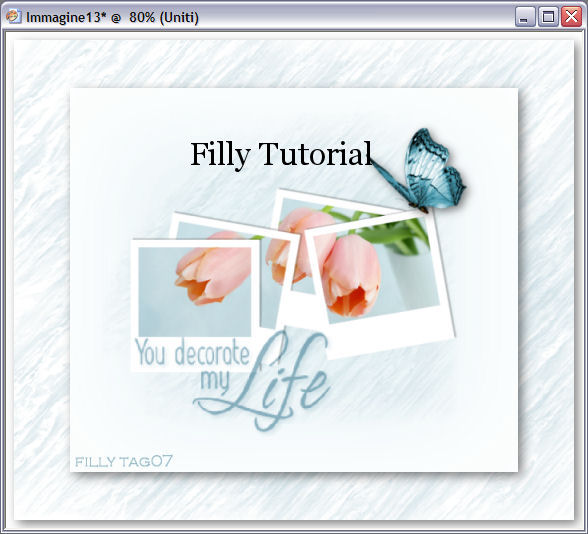
Your
result should be as shown in the image here below
Open
the Butterfly tube
Copy and paste as a new Layer
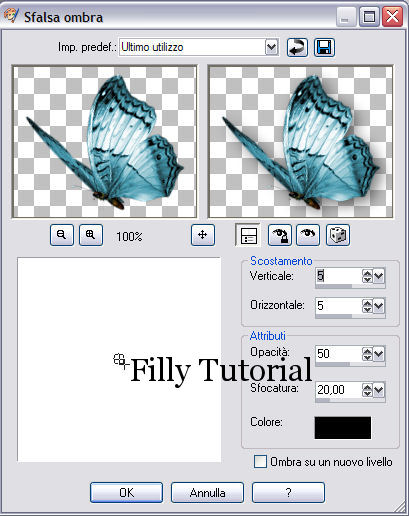
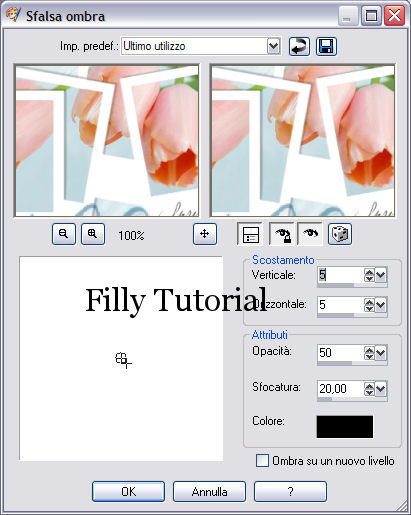
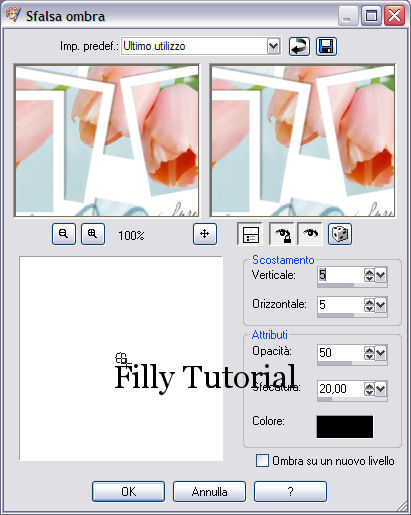
Effects - 3D Effects - Drop Shadow with the following settings
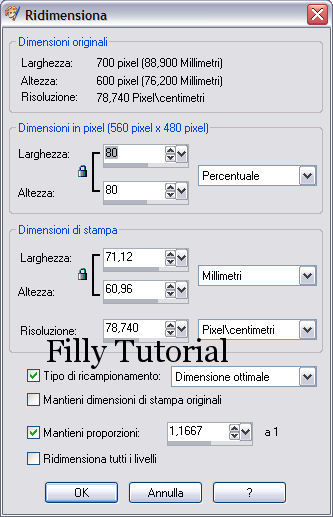
Layers Merge Visible and resize as shown in the image
Do NOT check “all layers” when resizing
New Raster Layer
Color White
Brush your canvas as shown here below with your Aurora brush
again
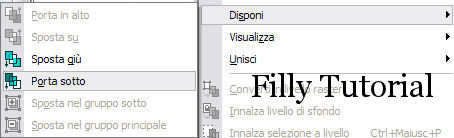
Layers - Arrange - Move down
Effects 3D Drop Shadow with these settings
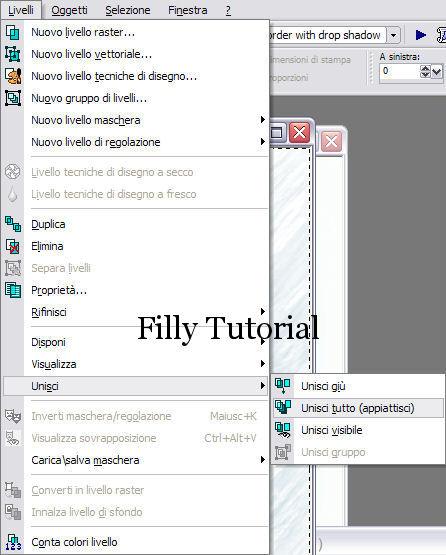
Layers Merge - Merge All Flatten
Selections All - Image - Add Border with these settings

Keep SELECTED
Effects 3D Drop Shadow with these settings
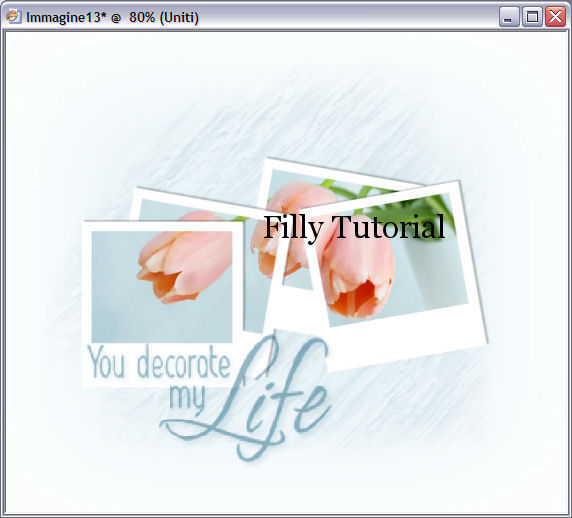
You will have this result
Apply your name with your Favorite Font
Save as jpg and your tag is ready
Within the zipped file you will find another set of photographs
which you can
use with some variations.